Thursday, December 28, 2006

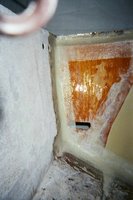
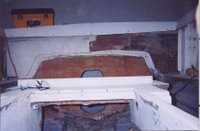
Cover to my live well


In these pictures I took my poly mar live well lid and did the same process as I explained for my fish box hatch covers. But for my lid I went ahead and added screws and bungs. When you read my blog these pictures will be before my hatch covers so if you scroll down you can see how I did my covers. I didn't plan my picture lay out very well.

Hatch covers


After they cured I removed all screws and washers and started sanding with 60 grit. I had to take my dremal tool with a small grinding bit and clean out some of the gaps. Because some of the epoxy rose up to the surface when clamping pressure was applied. In the top picture notice the blue masking tape on the end. I did this because the grain on the end pieces are running east and west. And after they were sanded I taped them to protect them when I was sanding the grain that was running north and south. Because you never want to sand across the grain. After sanding with 60 grit to clean off the epoxy I took some black poly ether and filled in the gaps. I first started taking my time to try to stay neat and clean. But that wasn't working so I squeezed a big glob and worked it in with a metal putty knife. After that cured I sanded again with 60 grit and finished sanding with 80 grit and then 120 grit. I will later install some real nice stainless recessed hatch lifts and rub some teak oil on the panels to darken them up a little. Later when I install my teak decking and have all screws and bungs in I will add screws and bungs to the panels so they line up with the bungs on the deck.

Teaking out


After I made my measurements and cut my teak, I laid it out to get the spacing I wanted. I used #10 screws for the space I wanted. My teak strips are 1 3/4" wide and 3/8" thick. I pre -clamped everything before I bonded everything for real. I used #10 sheet metal screws with 1/4" fender washers for my clamping means. When I was ready took everything apart and lightly sanded the panels with 60 grit sand paper. I then numbered each strip so I knew which one went where because I had to narrow some of the strips with my table saw so they would fit in space of the panel I was using. I then sanded the bottom sides of the teak strips with 60 grit and cleaned with acetone. I wetted the surface of the panels and the bottoms of the teak with epoxy and 206 hardener I then mixed epoxy with 404 filler with the consistency of mayonnaise and used a 1/8" notched spreader to spread the mixture on the panels. I then laid the teak in place and clamped the strips down using the screws and fender washers. The screws were coated in Pam cooking spray so the epoxy will not stick when it comes time to remove the screws and washers.

Plastic


This is the other winter project I did in my small townhouse garage. These are my in the floor fish box hatch covers. They are made of polymer also known as starboard I call it plastic for short. These are old and faded but I can still use them for my idea. My boat is going to have a teak deck so I need to build hatch covers to match. These plastic panels will be the platform for my teak strips. First I removed the old hatch pulls then I sanded with 60 grit sand paper. I filled the holes used for the recessed hatch pulls with epoxy mixed with 404 filler with the consistency of peanut butter. I then coated the panels with two coats of epoxy with 206 hardener and let cure. I did this so whenI bond the teak to the panels the epoxy has a good base to bite into for good holding strength.

Swim platform III


Here is the swim platform after it cured. To protect it from the sun I will apply a clear two part polyurethane varnish. Buy doing it this way your bright work will last for three to four seasons in stead of just one. The reason is the epoxy stabilizes the wood meaning that the wood does not expand and contract. This is the main reason varnish has to be applied every year. As the wood expands and contracts it causes the varnish to crack. These cracks allows the elements to get undeneath causing the varnish to flake off and the teak to fade. With the epoxy applied first it gives the varnish a stable platform to adhere to which allows the varnish to last much longer. The epoxy does not fade because the varnish provides the UV protection. My boat is going to have alot of teak on it, and all the teak that is not subject to foot traffic will be done this way.

Swim platform II


I made all the final adjustments and cuts and screwed the platform back together. The original platform was screwed together with stainless screws from the bottom. I decided to screw everything from the top and counter sink all the screw holes. I used #8 silicon bronze Frearson flat head wood screws. My counter sink was 3/8" . After all the screws were in, I filled all the holes with 3/8" teak bungs. I brushed each hole and teak bung with West System epoxy with 206 slow hardener. After it cured I sanded down the bungs flush and hand sanded lightly with 80 grit sand paper and cleaned with the wipe on wipe off method with acetone. I then mixed some epoxy with some 207 special coating hardener and brushed the platform. The last picture shows the platform curing. The hardener has light amber tint to it and it made the teak a beautiful golden brown.

Swim platform I


Well winter has set in full force. So I'm changing gears and taking a break from boat building.
I decided to work on few small projects for the boat and go ahead get them out of the way. I bought this old swim platform from a guy for $200.00 . I felt like I paid to much but a brand new one this size was between $800.00 and $900.00 . Its hard to tell but this swim platform looked like a piece of drift wood. Also five out of the six main slat supports were rotten. I first started with a sander with 60 grit to see if I could bring out the color again. After I realized that it was going to clean up nicely I took it apart so I could really put a good sanding on it. I sanded first with 60 grit then 80 grit and finished with 120 grit. I was very pleased with way the teak came back, it has beautiful grain lines. The main rails were in great shape, but I had to re-make all of the main support boards and ten of the rail spacers. This platform was off a boat that had a straight transom, on a Formula the main part of the transom steps out from the rest of the transom. So I had to build two pieces for each end of the platform so the platform would hug the transom of the Formula without any large gaps. The last picture shows everything clamped together so I could make any final adjustments before I screw it together.

Tuesday, December 12, 2006

Transom XI


In the pictures above I prepared the transom for the fiberglass. I used 1708 bi-axle with stitch mat back. I first wetted the surface with epoxy and then skimmed some epoxy with some 404 filler. This would act as my second pair of arms and help me hold the glass up until I had the glass laid in the way I wanted it. To get the glass to lay in the corners smoothly I made cuts called crows feet or crows foot this worked out well. After the glass was in place I finished wetting it out with west system epoxy and smoothed all the wrinkles and worked all the air out with a plastic squeegee. It cured very nice and super strong.

Saturday, October 28, 2006

Transom X


After I completed the transom I took some 404 filler and epoxy and put a fillet on all the corners. You need to do this so when you lay the new glass it lays smoothly in the corners with no sharp angles. If you have sharp right angles you can get a void in your glass lay up. After the epoxy had cured I took some six inch bi-axle glass tape with stitch mat back and laid it up around the transom. I did this to tie in the transom with the sides and the bottom of the hull. Next I will glass in the whole transom with Fiberglas and this will complete the transom for now.

Sunday, October 22, 2006

Transom IX


This is the second part of the transom after it has bonded and cured. I took some epoxy with some 404 filler and a 10" spreader and filled in the gap between the two sections of the transom. When it was cured I sanded everything smooth, now the transom looks and works as one complete unit. When you knock on it with your hand it feels solid like a rock. The next stage is to glass it in.

Transom VIII


After I prepared the area I made some patterns and cut and dry fitted my new pieces. The new pieces were made out of 1" marine grade fir plywood. The original was only 1/2". This part of the transom had a slight curve and the 1" plywood was very ridgid. So to get the wood to bend to the shape of the curved transom I made cuts with my skilsaw on the back of the wood pieces 5/8" deep every 3 inches. So when I bonded the wood to the boat this allowed the wood to draw up tight to the fiberglass skin with no voids. I clamped the wood using screws and fender washers srewed in from the outside. I used epoxy mixed with 404 to bond the wood and also I used a plastic spreader to fill the slots I cut with the saw.

Transom VII


In these series of pictures I have started to prepare the second part of the transom for repair. The transom core of this section had lot water and rot. I could take a hand full of rotten wood and squeeze water out like a sponge. The last picture shows all the core removed.

Friday, October 20, 2006

Transom VI


In the first two pictures shows how I clamp the transom board to the boat. But this system wasn't enough so also coated some #10 by 3/4" screws and some fender washers with some Pam cooking spray and screwed several screws from the outside through the fiberglass skin into the transom board. I did this to make sure the fiberglass skin and the board had 100% contact. The pam is to keep the epoxy from sticking to the screws so when it is finished curing you can easily remove the screws. Afterwards I will go back and fill and fair the holes and when its painted you will never know. The next two pictures show the transom after it has cured and the clamping boards removed. After the boards were removed I took a small hammer and lightly tapped all over the transom from the outside. I did this to check to see if I had a good bond with the board and the fiberglass skin. I did find one spot the size of a 50 cent piece that had a void. I will go back later and drill a 3/16" hole and eject some thickened epoxy to fill the void. But all in all I was very pleased with the outcome. The last picture shows the hole cut out. I took some fiberglass cloth and some epoxy and sealed the exposed wood of the transom. After that cured I took my grinder and ground down the edges to make a smooth finish.

Transom V


Here Im preparing the transom board to be bonded to the boat. The first two pictures show a bed of West system epoxy mixed with 404 filler to the consistency of peanut butter. Then I took epoxy with no filler and wetted out the rest of the surface area. The last two pictures are showing wetting out the transom board with epoxy and then skimming the board with a epoxy mixed with 404 with the consistency of manonnaise. I also skimmed the transom area on the boat with the 404 mixture but I don't have a picture showing that. When I started the bonding process on this day the temperature was about 72 but a cold front was blowing in and before I got finished and the epoxy cured it was 37 degrees. But I wasn't worried because I knew the West system epoxy has very good cold weather cure characteristics.