Wednesday, November 14, 2007

My Son


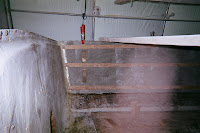
This is my oldest son Jake. He is 5 1/2 now and getting big enough to help his dad. If you go back in my blog there is a picture with him in it . In that picture he was just 2, " Yea I know, if you do the math I have been working on this boat for 3 1/2 years. " But back on this day in this picture Jake was so proud and eager to work on his dads boat. And let me tell you I was so happy to let him, I can hardly see the keys right now trying to type this. Seeing him standing there so proud to be wearing the stuff daddy wares when I'M working.

Coosa time IV


After I poured the 404 epoxy along the chine I took my spreader and worked the epoxy in place. In bottom two pictures I started to work on the next panel. This time I cut a strip 2 inches wide by 8 feet to bond to the upper lip of the boat. Its hard to tell in these pictures but the side of the boat raises from the chine to the top at a slight angel but the last 2 inches where the rub rail screws too turns back vertical. And where that happens creates this seam so when I place my panel in place it causes a void along that last 2 inches about a 1/4 inch wide. So I'M putting this 2 inch strip in first then I will cut the next panel to fit between the strip and the chine. This eliminates any hard bends, and where the two pieces join I will fair out and sand smooth and will look and feel as if it is one piece.

Coosa time III


In these pictures the epoxy has cured and I have removed the wood strips. I mixed some more epoxy with 404 filler and filled in the space I left along the bottom along the chine of the boat. Later before I glass it in I will put a good fillet along the chine with more 404 epoxy.

Coosa time II


After I applied the epoxy I put the panel in place. I really, really wanted to vacuum bag this step but my pump was acting up. I just couldn't trust my pump, I didn't want to be in the middle of the cure and the pump go out. So I cut some thin strips out of 1/2 inch plywood and screwed them to the boat clamping the panel to the side. On the positive side it worked very well but on the negative side I have created more work for my self by going back and filling in all the screw holes. I know when I finish you will never see where they were but I just don't like putting holes in my boat. I spent good money to buy all the stuff I needed to vacuum bag this project but when I did a dry practice run my pump stopped, and broke my trust to depend on it when had it laid up for real. I'M very anal about having voids in my glass work.

Coosa time I


It is November the 14th and finally I was able to get some work done to my boat. In these pictures I'M bonding a product known as coosa board. It is made out of foam and fiberglass and is very light and very strong when installed. The cossa board I'M using is 3/8 of an inch thick. I'M bonding this to the sides of my boat to add strength and thickness with out adding any weight. It also does not rot. First I cut to the size I needed then I sanded the area on the boat with 60 grit sand paper where I was putting the board. Then I mixed 20oz of west system 105 resin with 4oz of 206 hardener. I then took a 2" chip brush and wetted out the area on the boat and the coosa board. I then took some west 404 filler and mixed it in the remaining epoxy and took my notched spreader and applied it to the board to be bonded. The coosa board is so porous I did not need to sand before applying the resin. When I'M finished with the final lay up, the sides of my boat will be just shy of 3/4 ".

Monday, April 16, 2007

Reinforcing the bottom


After the stringers were removed, I took some epoxy with some 404 filler and filled in all the strakes and channels where the stringers were located. I did this to reinforce the hull. After removing the stringers down the middle of the boat I had to remove some old glass. I then took some six inch bi-axle and laid it along were the old stringers were. Then I cut two pieces of 1708 and laid right down the middle. After it cured you could really fill the difference in the stiffness of the hull. The plan is add one more layer of 1708 six inches wider on both sides than the first one. I'm going to finish fairing out the bottom of the hull with epoxy with 404 filler. The next step will be to reinforce the hull sides with 3/8" coosa, I will be vacuum bagging for this process. Then I'm going to add four layers of glass to the entire bottom of the hull from bow to stern. My lay up schedule will be as follows : woven roven, matt, woven roven, matt. After all of this is done I'm going to build and install my new stringers. The stringers will be made with foam glassed in with six layers of 1708.

Sunday, February 18, 2007

No pictures lately

I haven't posted any pictures lately but rest assured I'm still working on the boat. Ive been doing a lot of planning and getting materials together. The next stage of work will include adding more fiberglass to the bottom of the hull, building and installing my stringers and vacuum bagging my coosa coring material. I'm getting to the point to where the pictures are current and the work posted is actual time. The pictures I have posted so far have been time compressed over a three year period. Not having the boat in your back yard and having two new babies in the past three years makes it hard to find time to work on your boat. But I refuse to quit and I'm getting to the point were I have more time. That's enough feeling sorry for myself I'm going to step it up a notch and get this boat built.

Friday, January 19, 2007

Supporting the sides


Once the deck was lifted off the hull the sides wanted to sag a little. So I took my tape measure and took the inside measurements of the deck in several places. At the place I took the measurement I mark it on the hull. Then I took some 2x4's and ripped them in half long ways and cut them to match the width of the deck. Then I made some end caps and screwed them to the ends of the boards. Then at the marks on the hull I placed them over the hull. What this does is, it pulls the sides of the hull back in line as if the deck lid was back on the boat. Its very important to keep the hull as in shape as possible so when you glass things back in you don't end up making a twisted boat that doesn't ride very well.

Removing the deck lid


I took two 2x4's some rope, eye bolts and two come alongs and rigged the deck to be lifted off the hull. The deck lid is not that heavy so I used the main beam of my building to support my rigging. I used my 8 foot ladder so I could reach my come along and I slowly started cranking up the deck. I would alternate from back to front so I could lift it as evenly as I could, because remember I'M doing this boat all by myself. My helpers are only 5 and 3. I was very pleased when I was finished because my plan worked.

Ready to separate


Here are the pictures with the rub rail off. It is now ready to separate.

Removing the rubrail


Before I install the stringers I wanted to separate the deck from the hull. The reason is because, before I glass in the stringers I will be adding more glass to the bottom of the hull to beef up the hull. In 1968 they did not put a lot of glass in the boats. Also I will be vacuuming bagging 3/8" coosa board panels to the sides of the free wall of the boat. So I need the deck off to give me plenty of room to work. Plus I plan on working on the deck when I'M done with the hull. Having it off will make so much easier. In these pictures show the beginning of the removal of the rub rail. The rub rail was custom made out of teak and had a stainless steel band screwed to it for protection. Once the rub rail was off I had to remove the through bolts that clamped the deck to the hull. Then I took my razor knife to cut the silicon bead around the boat to free the deck lid from the hull. When it was completely cut I was ready to separate.

Bulkhead removal


Well winter is over and its back to work on the project. In these photos I removed the cabin bulk head and the rest of the floor. I'M prepping the boat so I can remove the stringers. The stringers will be completely replaced once I make up my mind on what material I want to use.

Saturday, January 13, 2007

409cu.in 330 HP of BAD ASS


Here is another winter project. When I bought the boat the engine was a fresh new long block. Recently rebuilt by a machine shop in Hopewell Va. The engine is a 1972 Chevy 400 small block with 4 bolt main caps. The engine came out of an old school bus. The engine was bored 30 over and the crank is a brand new out the box steel crank. The heads are 350 heads that were drilled for the steam ports that are in the 400 block. It also has the original bow tie high rise intake manifold. It has the typical marine cam with a double roller timing gear set. So when I got the engine I bought and installed a new Holly 750 double pump 4 barrel manual choke carburetor. New manifolds and risers and a fresh water cooling system. New starter, wires, plugs, cap and rotor. New flywheel and fuel filter. When the shop built the engine they said it has at least 330hp maybe a tad more. I know when I had everything put together and started it up in my garage it sounded BAAD! In fact it sounded so bad my asshole neighbor called the police on me for disturbing the peace. I can't wait to put this motor in. With the hp and the weight of my boat and the out drive I have. This boat should do at least 60mph maybe 62mph. The out drive is a Volvo 290 DP. I wanted to add that when I took these pictures, the original carb was on it which had an electric choke. This engine replaces the original engine which was a Chevy 350 270hp. That's why you see the original carb cover with AQ271C.