Wednesday, November 14, 2007

My Son


This is my oldest son Jake. He is 5 1/2 now and getting big enough to help his dad. If you go back in my blog there is a picture with him in it . In that picture he was just 2, " Yea I know, if you do the math I have been working on this boat for 3 1/2 years. " But back on this day in this picture Jake was so proud and eager to work on his dads boat. And let me tell you I was so happy to let him, I can hardly see the keys right now trying to type this. Seeing him standing there so proud to be wearing the stuff daddy wares when I'M working.

Coosa time IV


After I poured the 404 epoxy along the chine I took my spreader and worked the epoxy in place. In bottom two pictures I started to work on the next panel. This time I cut a strip 2 inches wide by 8 feet to bond to the upper lip of the boat. Its hard to tell in these pictures but the side of the boat raises from the chine to the top at a slight angel but the last 2 inches where the rub rail screws too turns back vertical. And where that happens creates this seam so when I place my panel in place it causes a void along that last 2 inches about a 1/4 inch wide. So I'M putting this 2 inch strip in first then I will cut the next panel to fit between the strip and the chine. This eliminates any hard bends, and where the two pieces join I will fair out and sand smooth and will look and feel as if it is one piece.

Coosa time III


In these pictures the epoxy has cured and I have removed the wood strips. I mixed some more epoxy with 404 filler and filled in the space I left along the bottom along the chine of the boat. Later before I glass it in I will put a good fillet along the chine with more 404 epoxy.

Coosa time II


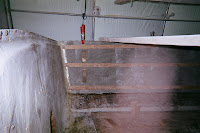
After I applied the epoxy I put the panel in place. I really, really wanted to vacuum bag this step but my pump was acting up. I just couldn't trust my pump, I didn't want to be in the middle of the cure and the pump go out. So I cut some thin strips out of 1/2 inch plywood and screwed them to the boat clamping the panel to the side. On the positive side it worked very well but on the negative side I have created more work for my self by going back and filling in all the screw holes. I know when I finish you will never see where they were but I just don't like putting holes in my boat. I spent good money to buy all the stuff I needed to vacuum bag this project but when I did a dry practice run my pump stopped, and broke my trust to depend on it when had it laid up for real. I'M very anal about having voids in my glass work.

Coosa time I


It is November the 14th and finally I was able to get some work done to my boat. In these pictures I'M bonding a product known as coosa board. It is made out of foam and fiberglass and is very light and very strong when installed. The cossa board I'M using is 3/8 of an inch thick. I'M bonding this to the sides of my boat to add strength and thickness with out adding any weight. It also does not rot. First I cut to the size I needed then I sanded the area on the boat with 60 grit sand paper where I was putting the board. Then I mixed 20oz of west system 105 resin with 4oz of 206 hardener. I then took a 2" chip brush and wetted out the area on the boat and the coosa board. I then took some west 404 filler and mixed it in the remaining epoxy and took my notched spreader and applied it to the board to be bonded. The coosa board is so porous I did not need to sand before applying the resin. When I'M finished with the final lay up, the sides of my boat will be just shy of 3/4 ".