Saturday, October 28, 2006

Transom X


After I completed the transom I took some 404 filler and epoxy and put a fillet on all the corners. You need to do this so when you lay the new glass it lays smoothly in the corners with no sharp angles. If you have sharp right angles you can get a void in your glass lay up. After the epoxy had cured I took some six inch bi-axle glass tape with stitch mat back and laid it up around the transom. I did this to tie in the transom with the sides and the bottom of the hull. Next I will glass in the whole transom with Fiberglas and this will complete the transom for now.

Sunday, October 22, 2006

Transom IX


This is the second part of the transom after it has bonded and cured. I took some epoxy with some 404 filler and a 10" spreader and filled in the gap between the two sections of the transom. When it was cured I sanded everything smooth, now the transom looks and works as one complete unit. When you knock on it with your hand it feels solid like a rock. The next stage is to glass it in.

Transom VIII


After I prepared the area I made some patterns and cut and dry fitted my new pieces. The new pieces were made out of 1" marine grade fir plywood. The original was only 1/2". This part of the transom had a slight curve and the 1" plywood was very ridgid. So to get the wood to bend to the shape of the curved transom I made cuts with my skilsaw on the back of the wood pieces 5/8" deep every 3 inches. So when I bonded the wood to the boat this allowed the wood to draw up tight to the fiberglass skin with no voids. I clamped the wood using screws and fender washers srewed in from the outside. I used epoxy mixed with 404 to bond the wood and also I used a plastic spreader to fill the slots I cut with the saw.

Transom VII


In these series of pictures I have started to prepare the second part of the transom for repair. The transom core of this section had lot water and rot. I could take a hand full of rotten wood and squeeze water out like a sponge. The last picture shows all the core removed.

Friday, October 20, 2006

Transom VI


In the first two pictures shows how I clamp the transom board to the boat. But this system wasn't enough so also coated some #10 by 3/4" screws and some fender washers with some Pam cooking spray and screwed several screws from the outside through the fiberglass skin into the transom board. I did this to make sure the fiberglass skin and the board had 100% contact. The pam is to keep the epoxy from sticking to the screws so when it is finished curing you can easily remove the screws. Afterwards I will go back and fill and fair the holes and when its painted you will never know. The next two pictures show the transom after it has cured and the clamping boards removed. After the boards were removed I took a small hammer and lightly tapped all over the transom from the outside. I did this to check to see if I had a good bond with the board and the fiberglass skin. I did find one spot the size of a 50 cent piece that had a void. I will go back later and drill a 3/16" hole and eject some thickened epoxy to fill the void. But all in all I was very pleased with the outcome. The last picture shows the hole cut out. I took some fiberglass cloth and some epoxy and sealed the exposed wood of the transom. After that cured I took my grinder and ground down the edges to make a smooth finish.

Transom V


Here Im preparing the transom board to be bonded to the boat. The first two pictures show a bed of West system epoxy mixed with 404 filler to the consistency of peanut butter. Then I took epoxy with no filler and wetted out the rest of the surface area. The last two pictures are showing wetting out the transom board with epoxy and then skimming the board with a epoxy mixed with 404 with the consistency of manonnaise. I also skimmed the transom area on the boat with the 404 mixture but I don't have a picture showing that. When I started the bonding process on this day the temperature was about 72 but a cold front was blowing in and before I got finished and the epoxy cured it was 37 degrees. But I wasn't worried because I knew the West system epoxy has very good cold weather cure characteristics.

Transom IV


I took a sheet of 3/4 " and 1 inch marine grade fir plywood and used my pattern to cut the shape of the transom. After the pieces were cut I took some epoxy and some 404 filler and bonded the two pieces together. I used # 10 silicon bronze screws to clamp the boards. In this picture I was doing a dry fit and making some aligning marks so when I bond it to the boat the transom board will be right were I want it.

Transom III


Here is the transom with all the core material removed. The core material used was marine grade plywood. Notice the patches for the twin out drives. The plan is to repair the transom first before I start the stringers. Right now the stringers were cut back four feet to give me room to work on the transom. After the prep work was finished I made a pattern out of craft paper and blue masking tape.

Tuesday, October 17, 2006

Transom II


I knew the transom had a soft spot on the right side but didnt know how bad until I removed the outdrive. Once the unit was removed I used a screwdriver to push and prod around the cut out and found that the whole right side was rotten. So I got grinder and a cutting disk and removed the inside skin. When I pulled the fiberglass off, the right side of the transom core fell out. You can see the patches from the Murcury outdrives. The boat originally had twin I/Os.

Transom I


The top picture shows the transom with the outdrive removed. Notice in the second picture I took a grinder with a 60 grit disk and ground out four areas on the transom. Those spots were gel coat cracks. When you have deep gel coat cracks the best way to fix them where they never come back is to grind the area to a 12 to 1 bevel. Next is to wet out the spot with your resin. Then take some chop stand mat and lay in the area to be patched. Cut your first piece to match the outside edge of the bevel. Then cut a series pieces progressively smaller with the last piece matching the edge of the inside bevel. Let cure and sand the high spots then you can fair it out using a fairing compound. Sand and paint. For this boat project I'm using all West System epoxy products. Anytime you are doing a secondary bond you should always use epoxy. Epoxy has a much higher bonding strength than polyester resin. You can check out there products at www.westsystem.com. I highly recommend them, they have been making epoxy for boats longer than anyone in the business.

Saturday, October 14, 2006

127 gallons of go-go juice


The fuel tank had about 50 gallons of 11 year old fuel. I hired a pump truck for about 127.00 to come and suck out the fuel. I had to remove the sending unit to get the vacuum hose down into the tank. It did a great job, I was impressed and to my surprise the tank was very clean and shiny being that it had fuel that was 11 years old. After the fuel tank was out I started to expose all the rot in the stringers. At first I was only going to repair the original stringers but decided to completly replace all the stringers with new stringers. So I started cutting the floor out. The project boat started to turn into a bigger project than I wanted but I know if I want a boat the way I want it I need to do it right. I used to build boats for Wahoo boats unlimited so I was not nervous to get the sawzall, grinder and skilsaw out.

Starting the tear down


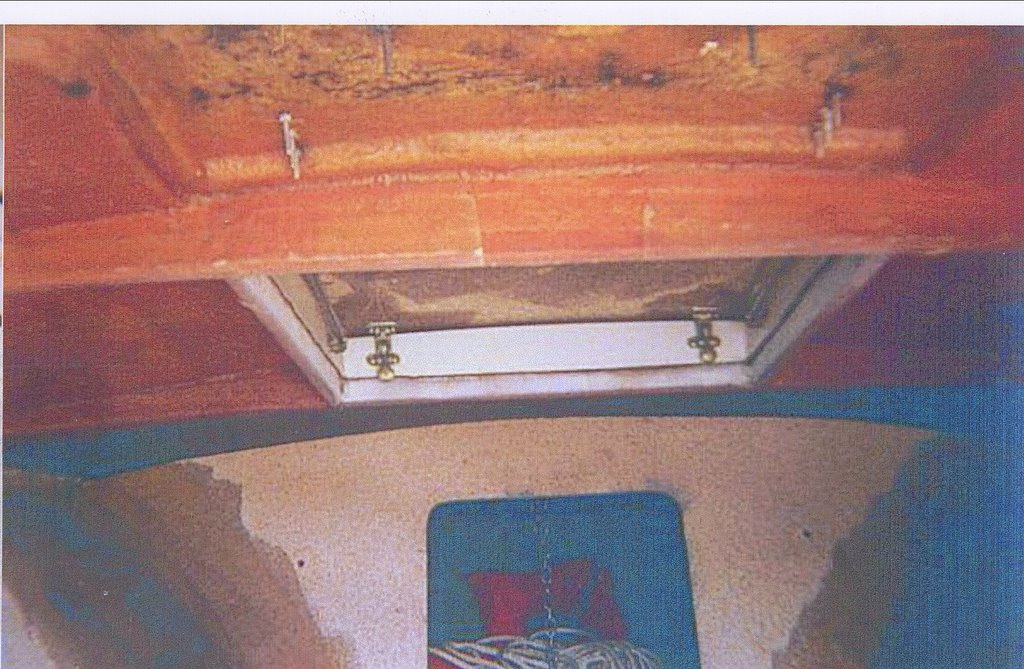
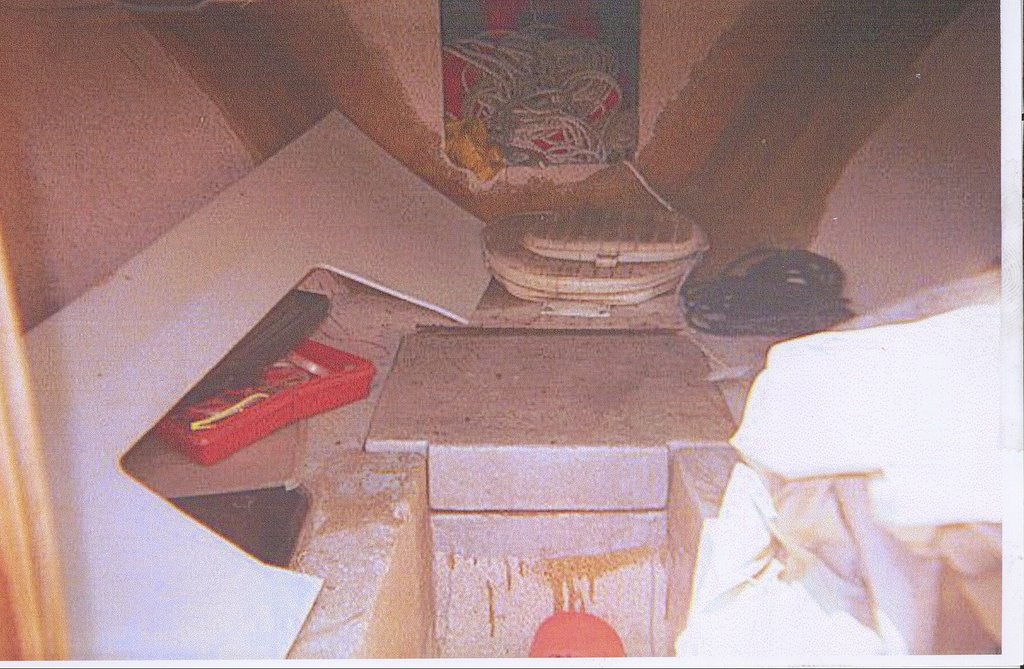
In these pictures I have the boat in its new home. The tear down process has begun. I started with the cabin door and then the windshied frame.

Friday, October 13, 2006

Engine box


Here is the engine box and engine compartment. The in the floor livewell is right in front of the engine box.

Helm and gunnels


Here is a look at the port and starboard gunnels and the helm. This boat has tons of fishing room. It has two in the floor fish boxes. A 20 gallon in the floor livewell and a 127 gallon fuel tank.

Cuddy cabin


These three pictures are the cabin and teak cabin door. The cabin was not finished during the first restoration, which is ok since as you will see later that I took the boat down to the bare hull.

Thursday, October 12, 2006

The transom


The transom. Little did I know the transom and I were going to be seeing a whole lot of each other.

Port side

This is the port side.

Starboard side


The next series of pictures are pictures of the boat before I bought it. My friend that I bought the boat from sent me these a few weeks before I went down to get it. In this picture the boat is on blocks at a boat yard called "Monkey Junction" Remember the picture of the boat in 1989. Well when my friend finished the restoration in '89 he ran the boat for a year. In the winter of 1990-91 the engine was not winterized and the brand new Volvo engine with forty hours cracked. To make long story short the boat sat here as you see it for eleven years. One day I was talking to my buddy and I asked him if he wanted to sell his Formula. I was expecting him to say no because he had a brand new engine in the garage his father in-law gave him. He also had a brand new Rolls aluminum tadam axle trailor. When he said yes I said "How much" he said "4500" I said "Done". So for 4500.00 I got a brand new trailor a brand new rebuilt 400 chevy small block"330 horse power" and a volvo DP 290 out drive with only forty hours. The boat was free.

A proud day


This is a very proud day in my life. It is August 29th 2003, A friend and I just finished picking up the boat in Wilmington, NC. We stopped and filled up with diesel just outside of town, if I remember correctly diesel was a 1.35 a gallon. We were on way back to Fairfax, VA. I knew when I bought the boat it needed some work but at that time little did I know how much work it really needed. This blog will show you everything I have done to the boat to this day.

What a beautiful boat


Here is my boat in 1989 in Wilmington, NC. This is what it looked like after the second owner completed a full restoration. This boat is thirty seven years old and and the lines of this boat are as pretty as any boat built today.